Here we have the completed 1920's (maybe early thirties) Ruby road
bike, once again fully functioning and ready to ride.
You can see what it looked like before I started
here Even after the extensive research we (thanks Siobhan) have done, I
still cannot say for certain whether this machine was built by Ruby
in Dunedin, which operated up until the late 1920
I think, or Ruby in Christchurch which operated up until the 1950's.
Advertisement for Ruby Special Cycles "The best and the prettiest"
Dunedin circa 1928
Advertisement for Ruby Cycle Works Christchurch circa; 1936
The gold high lights with red pin-stripping came up very nicely,
it is this colour combination which makes me think that this frame
could be from the Dunedin workshops.
It looks very 1920's to me, but would be happy to be proved wrong by
anyone who might be able to shed some light on this
....adrian@theflyingwheel.com
The gold on the seat stay caps was a nice touch I thought.
The original head transfer can just be made out, it seems to be
Boreas the Greek God of the North Wind, with the Earth in
behind. What is not so clear in the photo is
the script banner that contained the text which runs around
the sides and bottom of the image.
Must have been an impressive logo.
Williams crank set which seemed to have a single 'A' digit, this would have made it 1912/13 series crank set, which I
am very dubious about, it was a bit unclear so unfortunately
couldn't really be used to help date the bike, which is a a haphazard
way to date bike at the best of times to start with IMO.
More on Williams crank dating here and here
Phillips saddle actually softened up remarkably well over a month or two, and is also really comfortable, well at least
it was was over the 40 km test ride I have ridden it so far.
Classic Major Taylor cockpit, to be honest I am always very
tempted to place the bars under the outrigger, but have to say that
it makes for an extremely comfortable ride mounted as they are.
I guess there is good reason why most road men had them
mounted this way.
Very pleased with the wheelset, the brass nipples are a nice little
touch, after getting down and dirty with a wire wheel on drill, I then
rust neutralized both sides of the rims. The spokes where rubbed
down with medium wire wool, the final touch was rubbing in some
black stove polish which took to the old porous galvanized very well.
Even the hubs came up well, the thick layers of grease and dirt
had protected them well over many decades.
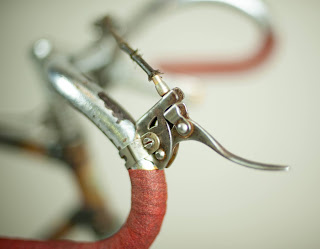
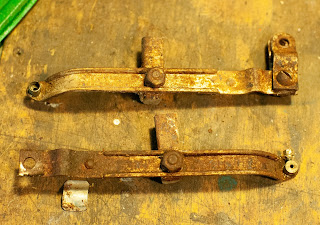
Those brakes!..here are the Australian made "GEM" brakes.
They work about as poorly as you would expect, though that being
said,most race bikes in New Zealand during this period didn't even
have brakes, and were fixed wheel, the term 'better than nothing'
kept springing to mind when I test rode the bike.


The brake lever looks like it could be extremely lethal in the wrong
accident..note to self..don't crash!
The RUBY down tube decal with Flying Wheels on each end...nice.

So there you have it, a complete ground up restoration of an (about)
hundred year old New Zealand build road racing bicycle,
ten years ago I would have probably have remade the decals,
stripped and repainted the bike.
That being said, I wouldn't get upset if someone out there decided
that is what they would prefer to do..each to their own I say.
Overall I am really pleased with the result, although very aged,
the patina is very nice, and the bike looks quite impressive, and
certainly feels impressive to ride.
I will post up a road test shortly, yes it was fun!


.jpg)


